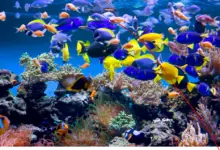
How to Culture Your Own Sustainable Fish Food for Pennies

Tired of spending a small fortune on fish food while wasting plastic tubs and foil packets? Why not culture your own live foods and infusoria for just pennies a day in eco-friendly culturing systems right at home?
In this guide, we will explore supplies needed, specific culturing methods, harvest techniques, storage options and the nutritional benefits of supplementing with homegrown foods. From brine shrimp to daphnia, microworms to infusoria, let’s unlock the world of sustainable aquaculture!
Gather Needed Culturing Supplies
Many common household items can be repurposed creatively to culture batches of productive live food economically and with very little effort for home aquaria.
Used Food Containers
Clean used yogurt cups, cottage cheese tubs and take out containers make perfect small hatcheries and culture vessels for a wide variety of microorganisms.
Thoroughly rinse soap residues under hot tap water after eating the original contents. Then let air dry completely before adding any culture media.
For larger volume applications like brine shrimp hatching, 2-liter bottles cut horizontally make nice widemouthed tanks. Clean and dry thoroughly first.
Air Pumps & Tubing
Small aquarium or pond air pumps are necessary for oxygenating brine shrimp and providing water movement to prevent foul stagnation in other cultures.
Standard flexible airline tubing in a variety of diameters connects air pumps to specially designed air stones, or air can simply be directed into the water column.
Liquid Fertilizers
MiracleGro and similar balanced liquid plant foods provide important nutrients for infusoria and microorganism cultures.
Use only formulas designated safe for aquatic plants to prevent toxic metal or salt buildups. Dispense very sparingly to avoid uncontrolled algae blooms.
Culture Media Ingredients
The base mixture used to fuel various starter cultures and live fooditems are media powders with proprietary ingredients tailored to specific species.
Key elements typically included are dried marine products, yeasts, seed powder, color enhancers, vitamins and beta carotene. Brands like Brine Shrimp Direct offer excellent media formula options.
Specialized substrates like peat, algae and spirulina discs also harbor helpful microorganisms certain species graze upon. Media materials last a very long time too.
Brine Shrimp Hatchery Setup
Artemia nauplii, commonly called brine shrimp, make fabulous starter fry foods with their tiny highly nutritious stage 1 plentiful harvests. Hatching them is remarkably simple.
Brine Shrimp Eggs
Fill cleaned and dried 2-liter soda bottles about halfway with good clean water, preferably filtered by reverse osmosis to remove chlorine and heavy metals present in some tap supplies.
Sprinkle one teaspoon of brine shrimp eggs in the bottle, and let them hydrate for 15 minutes before adding culture media powders. Two brands offering reliable cysts are Brine Shrimp Direct and San Francisco Bay.
Media and Aeration
Now add one heaping tablespoon of powdered brine shrimp hatch media like that made by Two Little Fishies in a fine mesh tea strainer. Tap gently to disperse it across the entire water surface so all eggs get coated evenly.
Place a simple air stone connected to a small air pump by plastic tubing at the bottom center of the bottle. Adjust the flow rate to strongly ripple the surface. Oxygen and correct salinity levels are critical for healthy hatch rates.
Greenwater Method
An optional step is inoculating the brine shrimp hatchery water with concentrated samples of green pond water or established tank algae. The additional infusoria and microorganisms enrich nutrition and boost hatch rates substantially. It creates an automatic first feeding too!
If green water sources are unavailable, simply proceed to harvests. The scene will still produce adequately. But any way to seed live food is very beneficial for increasing densities.
Maintaining Correct Salinity
After adding air and media, use hand refractometer to check hatchery salinity level. Optimal specific gravity for brine shrimp typically falls between 1.010 – 1.018. Add small amounts of marine salt or kosher salt if needed to reach proper mineralization.
Too low leads to deformed nauplii. Too high prevents hatching entirely. Getting the salinity perfect is crucial to culture success.
Harvesting Brine Shrimp Nauplii
Within 18 to 36 hours of setup, large numbers of newly hatched brine shrimp will fill the water column! Here is how to harvest them:
Attracting Container
Once hatched, brine shrimp naupli display positive phototaxis, meaning they swim toward light. Place a small cup or container illuminated by an external lamp near hatchery bottle openings. Open the cap and insert your make-shift trap!
Within minutes, thousands of tiny nutritional brine shrimp will fill the cup. Simply pour contents through fine mesh net to rinse any salt residues if needed. Feed immediately while still lively to fish or use to seed other cultures as described next.
Continuing Cultures
Leave some starter brine shrimp behind in the original hatch bottle, and add another teaspoon of eggs along with a few pinches of fresh media powder to fuel ongoing production cycles.
Given adequate aeration, remaining live nauplii, and correct salinity and temperature, bottles can continue yielding new batches of hatched brine every day or two for up to 6 weeks before fresh water and eggs are required!
Maintaining Microworm Cultures
Microworms make a superb sustainable fish food packed with over 60% protein! Maintaining productive cultures longterm takes only minutes a week too.
Starter Culture
Order a starter culture of microworms online through specialty aquaculture sites like Arizona Aquatic Gardens. Active colonies ship in oatmeal-like media.
Alternatively, seed initial cultures by collecting tiny samples from established tanks likely already harboring small worm populations. Scoop a spoonful of substrate near overflows or top-offs.
Combine seed samples into container with fresh media mix of instant mashed potatoes, tropical fish powdered flake food, and a few yeast granules to jumpstart robust reproduction rates.
Feeding Schedule
Cover the starter container to maintain ambient warmth and humidity microworms require. Check back in 3 or 4 days to find the surface covered in hundreds of microscopic worms!
To continue peak production, spoon out half the culture onto wax paper daily and feed back a tiny pinch of flake bits and fresh potato powder. Adding marine invertebrate preparations also enhances microworm nutrition substantially if available.
Harvesting Microworms
Collect established cultures overflowing with worms by scraping portions from the media surface using an angled artist’s painting knife to gather worms.
The enriched nutrition and moisture content keep worms pinned in place briefly on the wax paper. Simply shake critters into waiting fish tanks! Fry gobble sinking worms immediately.
Refrigerating excess harvest portions in airtight containers slows worm reproduction so extras last 2 weeks or more. Microworms enter stasis but revive to normal activity after warming.
By splitting cultures often, feeding consistently, and harvesting only a portion of each batch daily, microworm farms sustain for many months or even years!
Vinegar Eels Maintenance
The high speed wiggling action of tiny vinegar nematodes aptly named vinegar eels makes them irresistible nutrition and exercise for young fish! Cultures are super productive longterm too.
Making Cultures
Combine a cup of apple cider vinegar with a tablespoon of tropical fish powdered flake. Add a teaspoon of live baker’s yeast to jumpstart fermentation.
Stir thoroughly and pour mixture into cleaned, dried containers. Cover with paper towel and secure with rubber band to allow oxygen exchange while containing insects.
Inoculating Cultures
To seed new vinegar eel cultures, order starter kits online through specialty aquaculture vendors, or simply capture existing populations likely already present in home aquaria by collecting small samples of tank substrate debris near aerations spots.
Combine samples with vinegar medium, and populations will explode within days given adequate warmth and oxygen circulation!
Maintaining Cultures
Let vinegar eel cultures ferment one week minimum undisturbed to establish sustainable acidity and yeast levels. Begin feeding tiny daily amounts of powdered spirulina, marine invertebrate preparations, even leftover vegetable matter like cucumber shavings.
The fermentation process enriches nutrition while air exposure concentrates populations at the surface film, making harvests extremely convenient.
Spoon out portions avoiding unnecessary liquid, and feed as sinking protein-packed addition to standard diets! Cultures easily sustain 6 months or longer this way.
Unlocking Infusoria & Microorganisms
Even smallest of fry and filter feeding invertebrates need microscopic snacks to thrive. Seeding concentrated banks of infusoria containing paramecia, amoebas, daphnia and other single cell protein is wonderfully sustainable.
Water Collection
Harvest green water from established outdoor ponds likely already teeming with dense infusoria counts during warmer seasons especially. Slowly sweep fine mesh aquarium nets just below the surface to capture concentrations while avoiding collecting debris or predators.
Pour the dark concentrated liquid directly into tanks housing newly spawned fry or brackish filter feeders like mollies. Immediate microscopic grazing will commence!
DIY Infusoria Cultures
Concentrated batches can also be cultured freshly anytime by filling used containers with conditioned tap water, adding several inches of natural pond sediment and dried leaves like oak or almond. Adding a few lettuce leaves or vegetable shavings provides jumpstarts reproduction too.
Within days the water fills with nutritious paramecia, daphnia, rotifers and countless other microorganisms! Stir collects samples from the bottom before pouring into waiting fry tanks for instant infusorium-rich green water.
Daphnia Culture Overview
These tiny shrimp-like creatures called daphnia, or water fleas, make another fabulous nutritional supplement easily maintained using common materials already on hand.
Housing Cultures
Clean and dry empty plastic shoebox sized containers to use as daphnia hatcheries. Fill each about 20% full with conditioned tap water, and gather floating aquatic plants like duckweed or azolla if possible from outdoor ponds to help oxygenate the water column.
Next collect a few handfuls of natural pond dirt from the bottom to inoculate beneficial microorganisms, algae and infusoria. And add a small amount of spirulina powder or green powdered flake food to jumpstart populations.
Culture Maintenance
Place boxes near sunny windows and run air tubing connected to small pumps on the lowest setting just enough to ripple the surface. Natural sunlight fuels algal growth infusing nutrition while gentle aeration prevents stagnation.
Feed tiny amounts of powdered algae wafers, rice cereal or wheat germ once established to maintain exponential reproduction rates. Avoid overfeeding to prevent crashes.
Harvesting Daphnia
Checker weekly to monitor rising densities, removing a few scoops to populate tanks anytime numbers allow after the culture stabilizes, typically within weeks. Refrigerating excess serves as handy gutloaded live food banks for future feedings!
Simply scoop a cup or two of culture water from the surface to collect concentrations of mature daphnia ready for consumption in waiting fish tanks!
Copepod Production Goals
Copepods represent one of the most abundant plankton worldwide. Captive cultures unlock their amazing benefits as nutritious fish treats and infusoria grazers keeping hatcheries clean too.
Sourcing Copepods
To begin copepod production, first acquire starter cultures online from suppliers offering species ideally suited to freshwater aquaria in small quantities. Once established, they readily reproduce given adequate habitat and food sources.
Diverse blends with varying reproductive strategies and environmental preferences helps create sustainable longterm populations capable of utilizing all available niches efficiently.
Culture Parameters
Culture copepods in large shallow rubbermaid or cement mixing trays for maximum surface area since much grazing occurs near the air-water interface where infusoria also concentrate.
Maintain very clean non-chlorinated water with plenty of aeration promoting dense growths of edible biofilm and algae coatings on all surfaces. Avoid overfeeding artificial foods that degrade water quality.
Target consistent 80 degree Fahrenheit water temperatures to keep cultures thriving. Strategically place trays near sunny windows, utilizing room lighting, or even beneath brooding poultry families in homesteading situations!
Splitting & Harvesting
To prevent copepod population crashes when cultures peak, bleed off excess densities every few weeks. Simply dip into cultures using fine mesh nets, and pour into tanks housing fry and larvae happy to feast on these tasty nutritious critters!
By routinely splitting robust cultures into additional trays, stability remains strong longterm yielding a regular surplus harvest of live copepods to supplement fish diets at near zero cost!
Supplementing Fish Diets
Adding home cultured live foods to standard flake and pellet feeds boosts key nutrients while providing appropriate bite sizes even for smallest fry.
Optimizing Nutrition
Dried prepared foods slowly lose vitamin potency over time after packaging. Combining them with fresher gut loaded live items enhances amino acids, vitamins, pigments, highly digestible proteins and key lipids fish require.
This helps young develop healthy immune systems, bright colors, and prime finnage quality quickly. Adults gain improved health and longevity from the diet diversity too.
Exercise & Enrichment
The movement of live foods also triggers natural foraging instincts in fish leading to increased activity levels and faster growth rates. Introducing appropriate sized live items ensures even tiny spawned fry succeed at first prey capture attempts.
Culturing live foods literally brings aquaria to life! Watch species like egg scattering tetras dash madly at wiggling vinegar eels while shrimp pick at sinking micro worms and angel larvae snap up freshly hatched brine shrimp. It sparks wonderful feeding frenzies!
Conclusion
As you can see, producing your own sustainable fish feeds utilizing easily available materials and a bit of weekly maintenance yields awesome results for mere pennies!
The nutritional variety helps optimize health, the cost savings are tremendous, and eco-friendly production methods drastically reduce plastic waste from all those commercial fish food containers. It’s a win all around.
Even simpler infusoria cultures provide essential early grazer nutrition too. And brine shrimp hatcheries offer premium starter feeds to give fish the best beginnings. Then maintain microworm and vinegar eel cultures for steady harvests that will thrill species at all life stages!
Once familiar with these techniques, consider culturingrelationship sensitive species like daphnia or try producing large volume copepod cultures to unlock near endless dense nutrition. The possibilities are endless!
So gather some used containers and pumps, grab starter cultures online or from your existing tanks, mix up media formulas, and soon you’ll be sustaining endless fish food while doing your part to reduce waste. That’s something any aquarist can take pride in.